Initial Firmware Installation
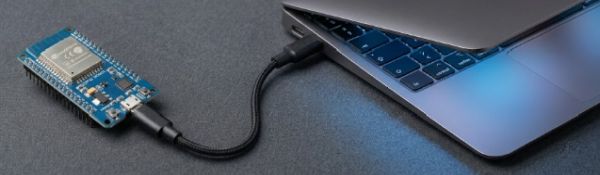
The first preparation step you need to complete is the installation of the firmware onto the controllers. This process is called flashing. Historically, this was one of the steps that caused the most frustration due to the need for specific desktop utilities and complex settings.
To make this process as simple as possible, we now use a modern, browser-based tool called ESPConnect.
ESPConnect is a free, open-source web tool for interacting with ESP32-based microcontrollers. It allows you to flash firmware directly from your browser using the same technology found in tools for WLED, Tasmota, and ESPHome. This is what will be shown in this guide for the firmware installation step, but other alternatives will also be covered.
Prerequisites
To complete the installation, you will need:
- Hardware: A computer with an available USB port and a microUSB Data Cable. (Note: “Power-only” cables will not work).
- Firmware: A copy of the firmware
.binfiles (available in the Releases area of the repository). - Software: A Chromium-based browser (Chrome, Edge, Brave, or Arc) version 89 or newer.
🖥️ Browser Alternatives
If you do not wish to use a Chromium-based browser, you must use traditional desktop flashing utilities. For guidance on that method, you can refer to my Beginner’s Guide to Flashing Custom Firmware video (skip to the 8:08 mark).
Primary and Wireless Sensor Controllers
You only need the sensor firmware if creating and using wireless sensors. The process for both controllers is identical. The only difference is the firmware .bin file used:
- Primary Controller: Use
Primary_Ctrl_vx.xx_Full.bin - Wireless Sensor Controller: Use
Sensor_Ctrl_vx.xx_Full.bin
(Note: vx.xx represents the version number. Always use the most recent versions found in the assets section of the latest release.
New Installs vs. Updates
After the initial release of this project, future updates will have two .bin files for each controller type. In addition to the _Full.bin, both controllers will have an _Update.bin asset available:
- Primary Controller Upgrade: Uses
Primary_Ctrl_vx.xx_Update.bin - Wireless Sensor Controller Upgrade: Uses
Sensor_Ctrl_vx.xx_Update.bin
⚠️ New Install Installation Order
If using wireless sensors, it is recommended that you install and onboard the PRIMARY controller before starting any WIRELESS SENSOR controllers. This is due to the fact that each wireless sensor will need to be configured with the IP address of the PRIMARY controller.
Step 1: Connect to ESPConnect
Open a Chromium-based browser and navigate to the ESPConnect Tool.
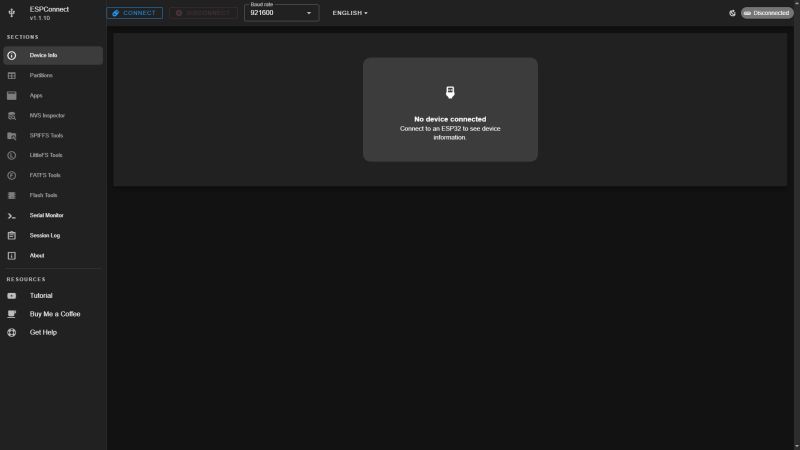
If you haven’t done so yet, connect the controller (the ESP32 for primary, or the Cheap Yellow Display for display) and click the Connect button in the upper-left corner.
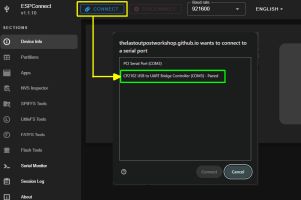
Select the appropriate COM Port.
🖥️ USB Drivers: The Invisible Gatekeepers
If your computer treats your ESP32 like an unrecognized alien artifact, you might be using a charge-only USB cable. Don’t feel bad; even the most seasoned developers have spent an hour troubleshooting a board only to realize they were using a “charge-only” USB cable they found in the back of a drawer. If you don’t see a new COM port appear, try a different cable before you start questioning your life choices.
🔍 Troubleshooting COM Ports
If you aren’t sure which port to pick, disconnect the ESP32 and check the list; the port that disappears is your device. If no ports appear (and you are using a known, good USB data cable), you may need to install the CP2102 or CH340 USB-to-Serial drivers for your specific hardware.
Recommended: If you have still have issues connecting to your ESP32, try changing the default baud rate to 115200 and try connecting again.
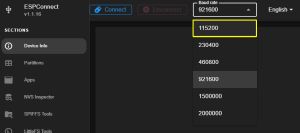
In fact, I recommend that you do this regardless. The flashing will take a few moments longer, but I’ve found that I get much more reliable results with a baud rate of 115,200 when working with the ESP32.
Step 2: Configure Flash Settings
Once connected, complete the following steps.
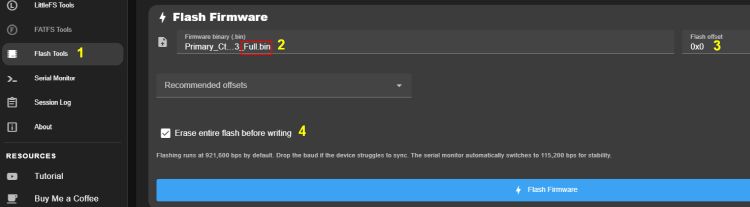
- Select Flash Tools: Select the Flash Tools option from the sidebar menu.
- Select Firmware: Click the Firmware Binary box and select the proper
_Full.binfile for the controller you are flashing. - Flash Offset: Leave this at the default 0x0.
- Erase Flash*: Check the Erase entire flash checkbox to ensure a clean installation.
- Install: Click the large blue “Flash Firmware” button to start the upload process.
⚠️ *Only Erase Flash for New Installs!
If you are using this method to upgrade the firmware on an existing controller, clear the ‘Erase enttire flash’ checkbox or your existing configuration, WiFi connection info, etc. will be lost and you will have to onboard and configure the controller again. See Installing Updates for details.
Step 3: Flash and Verify
ESPConnect will show a progress bar during the flashing process:
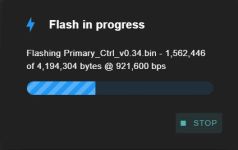
Once the flashing is complete, power cycle the ESP32 by unplugging and reconnecting it to the USB port. Wait a few moments, then use your phone or computer to scan for available Wi-Fi networks. The actual hotspot name that will be broadcast depends on which controller type you flashed:
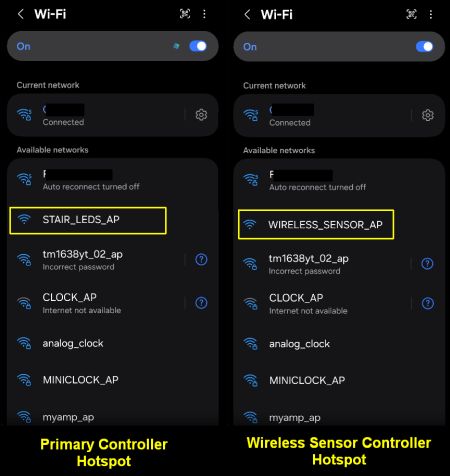
Success Criteria: If you see a Wi-Fi hotspot named STAIR_LEDS_AP (or WIRELESS_SENSOR_AP for a sensor), the flash was successful.
⏹️Hotspot Name
Note that the hotspot shown may use the assigned device name followed by ‘AP’ (e.g. _MyDeviceName_AP) instead of the defaults. This is likely if onboarding a previously used controller, but may happen with new installs as well if initial onboarding fails. The correct AP should be obvious as long as you use a descriptive device name.
Next Steps
Complete the above steps for the primary controller. Once flashed and broadcasting the respective hotspot, you are ready to join it to your Wi-Fi network. This is covered in the next section, Onboarding and First Time Setup.
⚠️ Important Note if Using Multiple Wireless Sensors
If you are planning on configuring multiple wireless sensors, you should flash and complete the next onboarding step BEFORE flashing the next sensor. This avoids multiple devices attempting to broadcast indentical hotspots. Once a controller is onboarded, the hotspot will discontinue and the next wireless controller can be flashed.